Before the IBM AT and the 80286 were introduced, the RAM in most PC clones was comprised of a number of individual ICs plugged into sockets on the motherboard. Since the 8086 could only address up to 1MB of memory, this arrangement worked well.
However when the 80286 came onto the scene, it could make use of up to 16MB of memory. As memory was still very expensive, and motherboard manufacturers didn't want to populate their boards with thousands of IC sockets, a new standard was needed to allow memory to be expanded as needed by the end-user.
One of the first of these was the Single Inline Pin Package (SIPP), which had the same 2.54mm pin spacing as one half of an IC, allowing existing IC sockets to be used as receptacles for the new type of memory.
The new SIPPs proved to be somewhat troublesome with their easily bent pins, and before long were replaced with SIMMs. SIMMs had no pins at all and used edge-connectors on the PCB instead, making them much more durable.
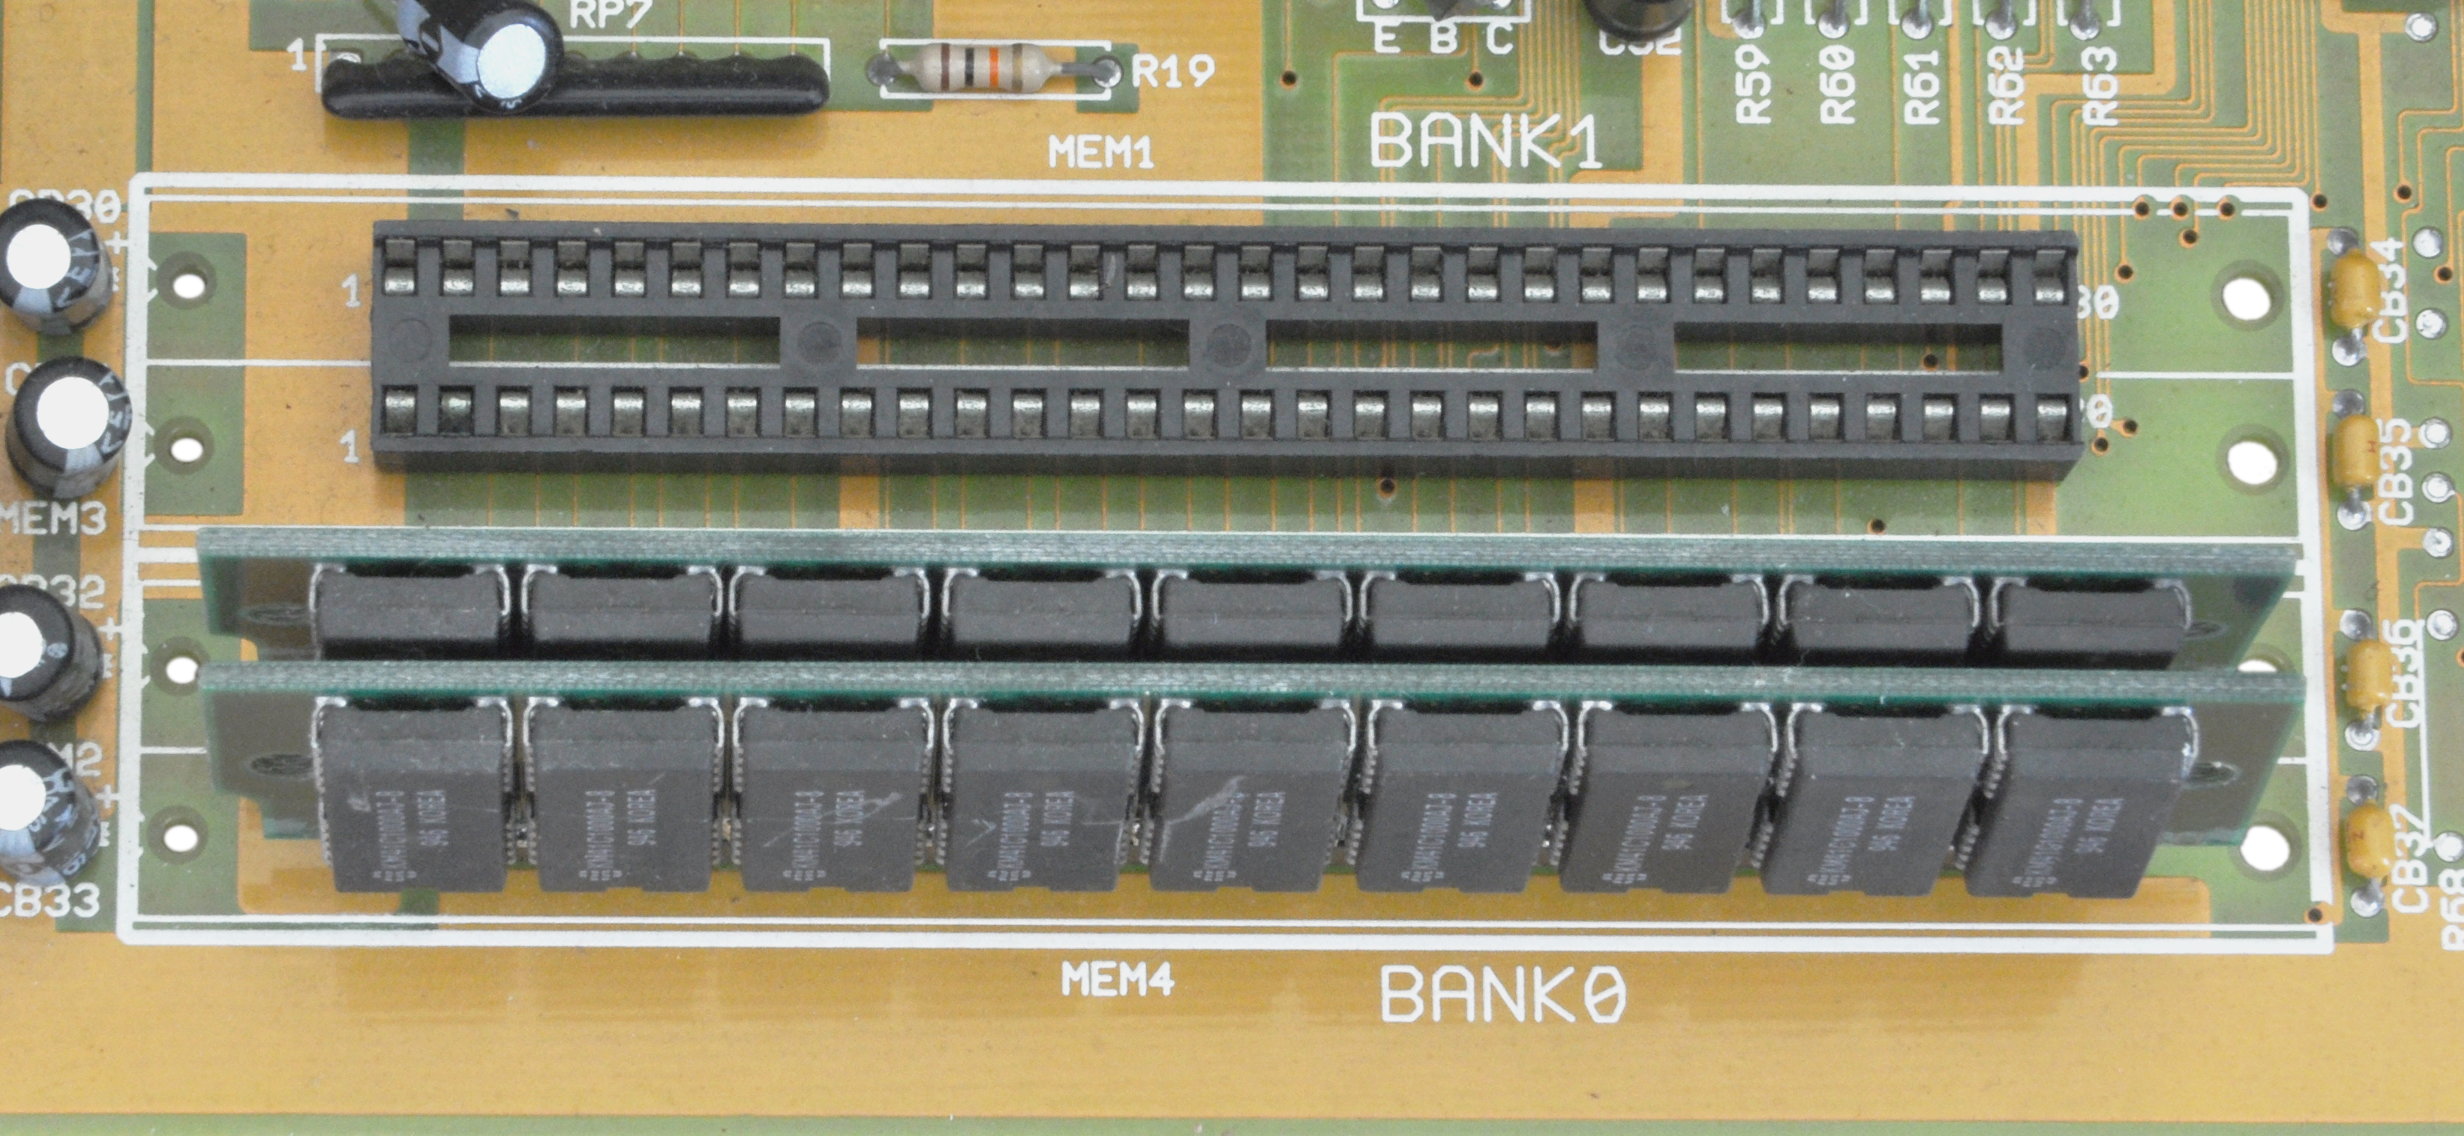
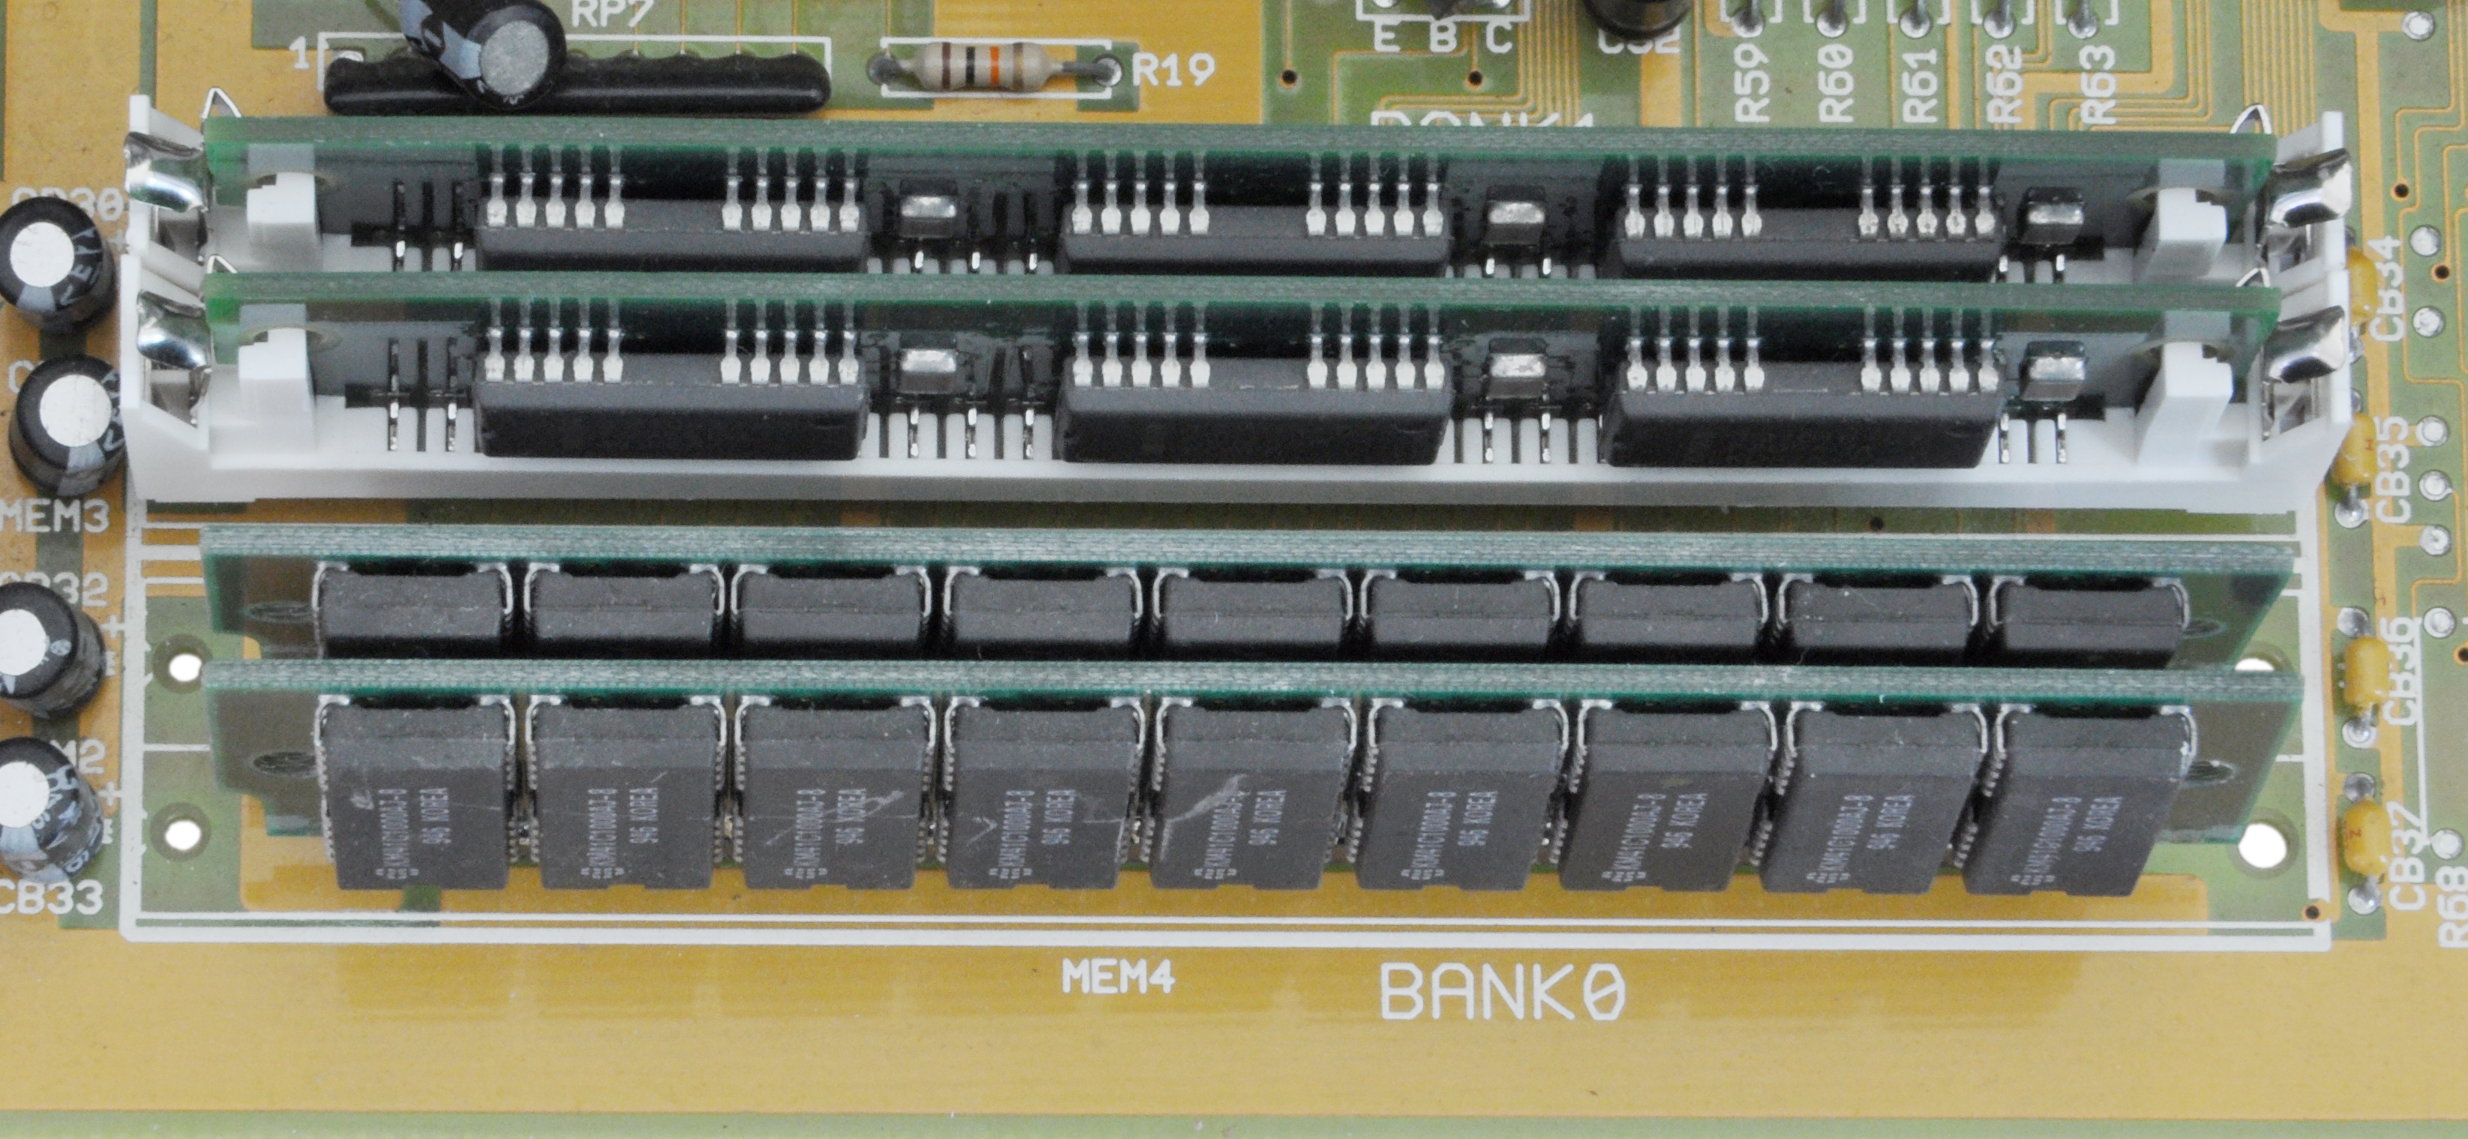
Since SIPPs were so short-lived, they are not readily available in the vintage PC marketplace. This is a problem for the retro PC enthusiast wanting to add additional memory to a motherboard with only SIPP sockets. When looking at my own "M209" 286 clone motherboard, the two spare SIPP sockets were crying out to be populated!
Luckily, the two standards are electrically compatible, so all it takes to make use of SIMMs is some way of making the mechanical connection. There are a few options for this:
- Desolder the SIPP socket and replace it with a SIMM socket.
- Solder pins onto a SIMM, turning it into a SIPP.
- Use an adapter to convert the SIPP socket into a SIMM socket.
The first option involves removing the SIPP socket and replacing it with a SIMM socket. While this is a very good solution and only involves a little soldering, it is a rather permanent change and removes the novelty of having a somewhat rare motherboard that uses SIPPs. For me this was tempting, especially as my motherboard was designed to host either socket type - it already had SIMM mounting holes - but then there would have been one less unique thing about this motherboard so I decided against it.
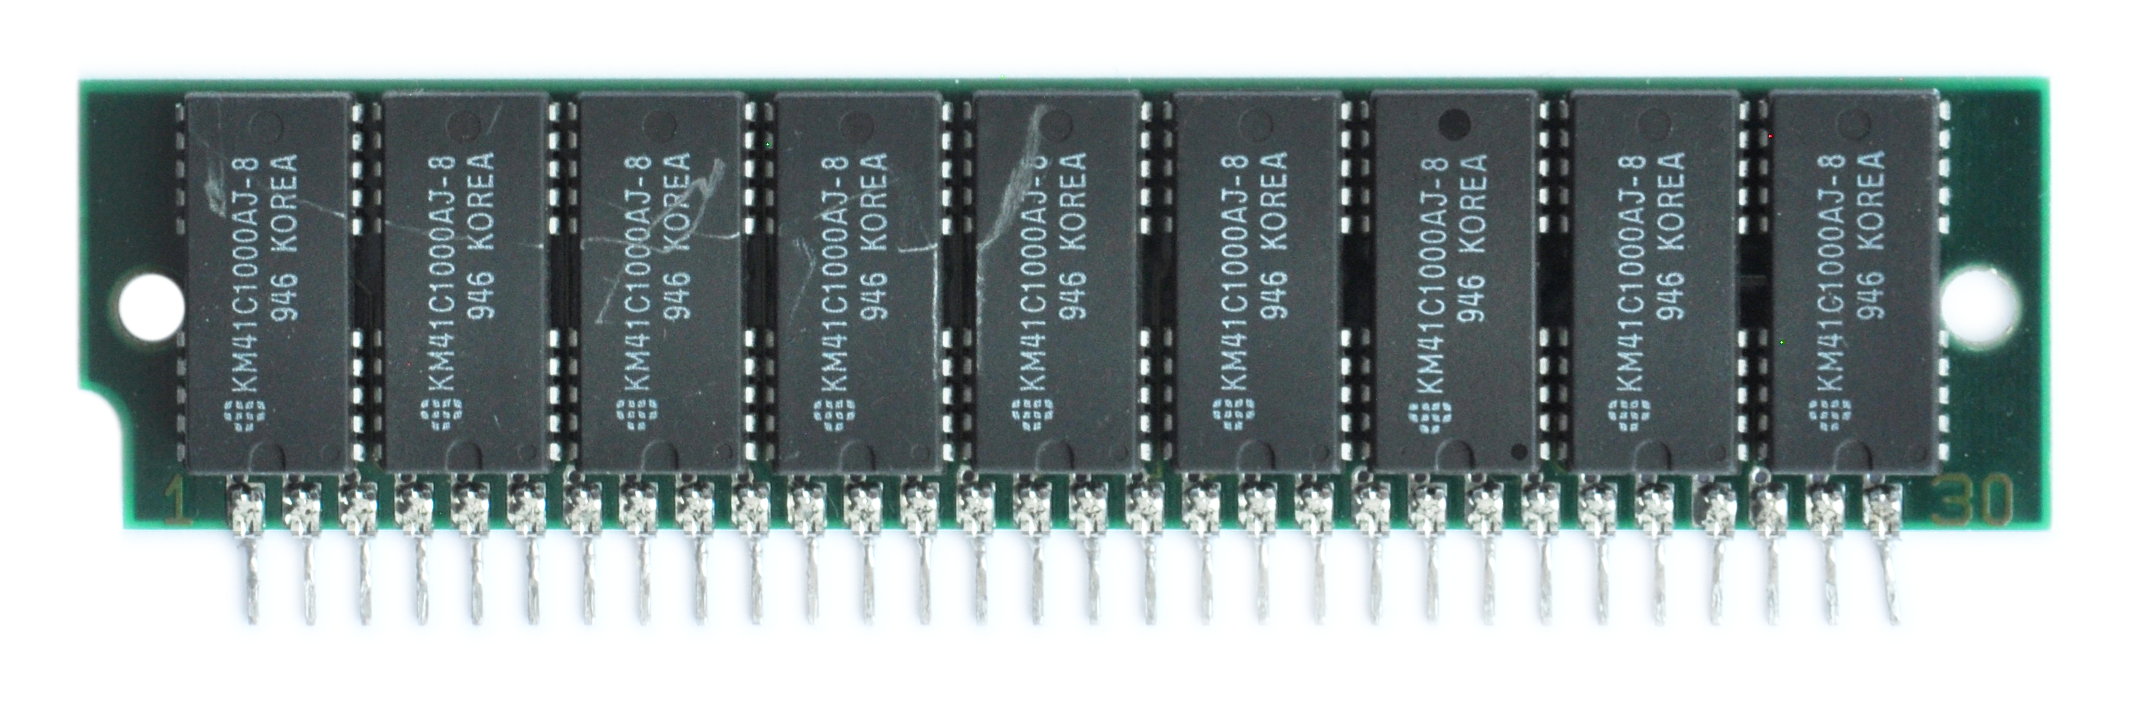
The second option involves finding 30 bare IC pins, and soldering them onto a SIMM. This is not that unusual, as many later SIPPs were actually SIMMs with pins soldered on. Indeed the SIPPs that came with this motherboard are SIMMs with pins soldered on (see photo above of SIPP module.) However again, this solution is difficult to reverse.
The third option, making a mechanical adapter, sounds the most complex but turned out to be the simplest by far. Since SIPP sockets are simply IC sockets, anything that looks like it has IC pins on it will fit. A brand new SIMM socket has pins like this, making it possible to plug a SIMM socket directly into the SIPP socket, and have it function as an adapter. Being fully reversible, this is the option I went with.
I thought it would be difficult to track down a 30-pin SIMM socket, but to my surprise, they are stocked by RS Components and only cost AU$6. I ordered two, and a couple of days later they arrived.
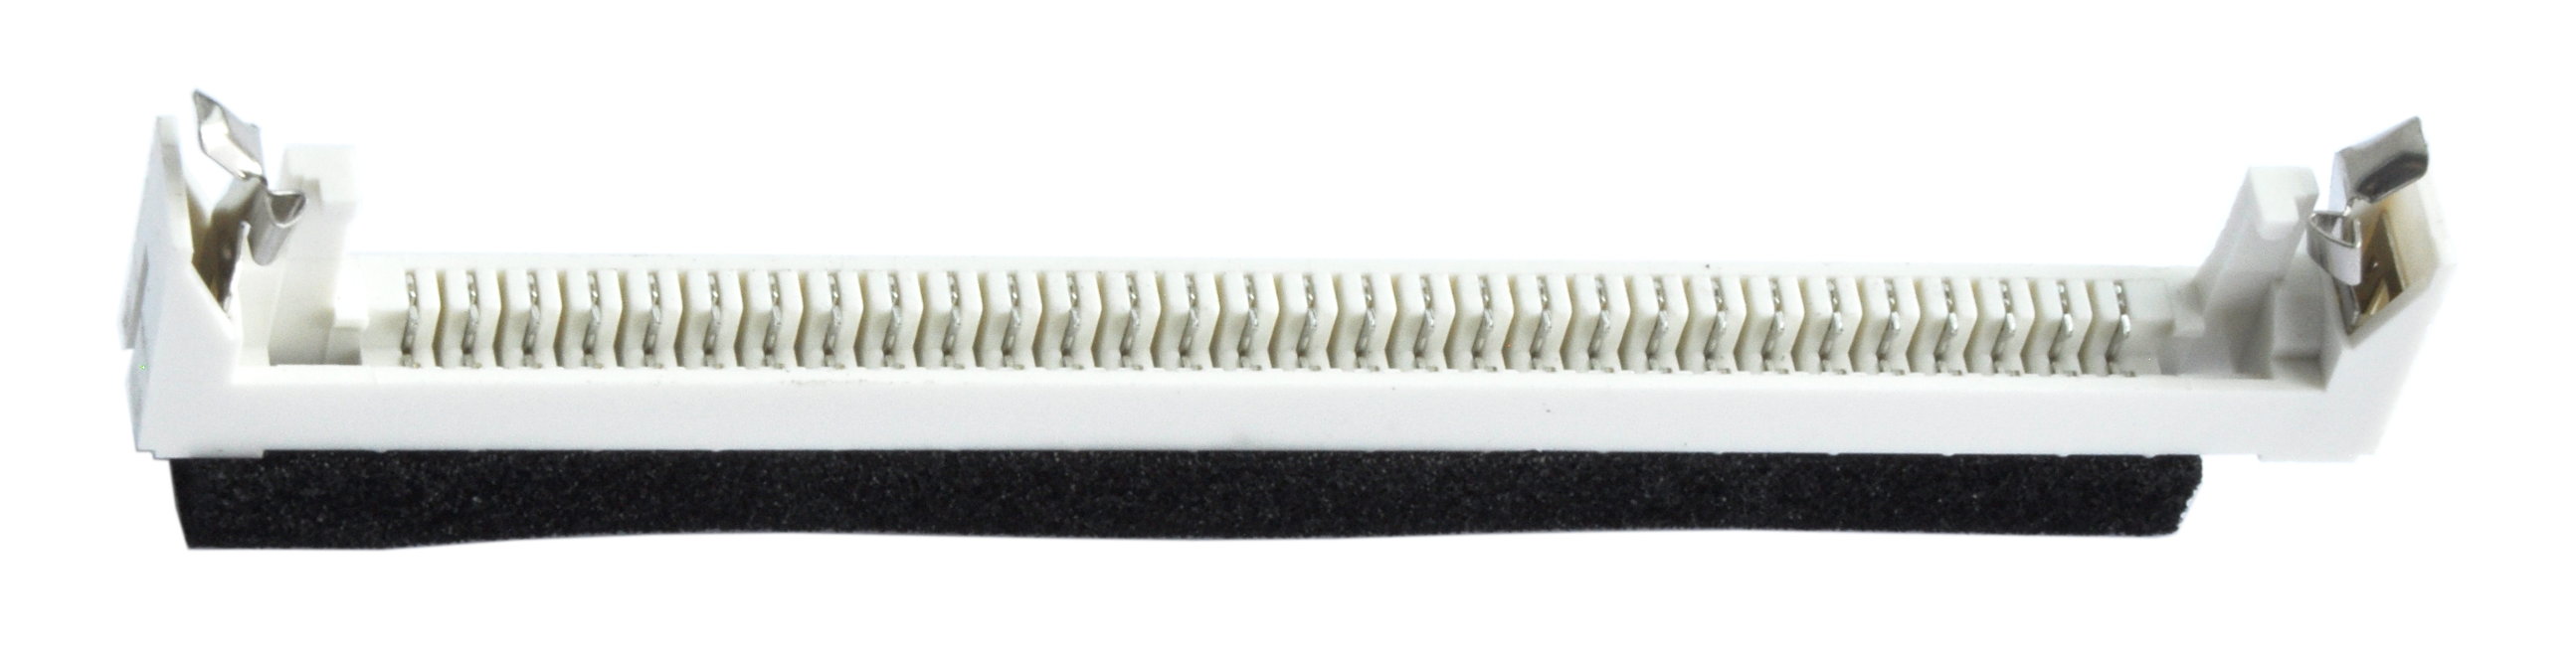
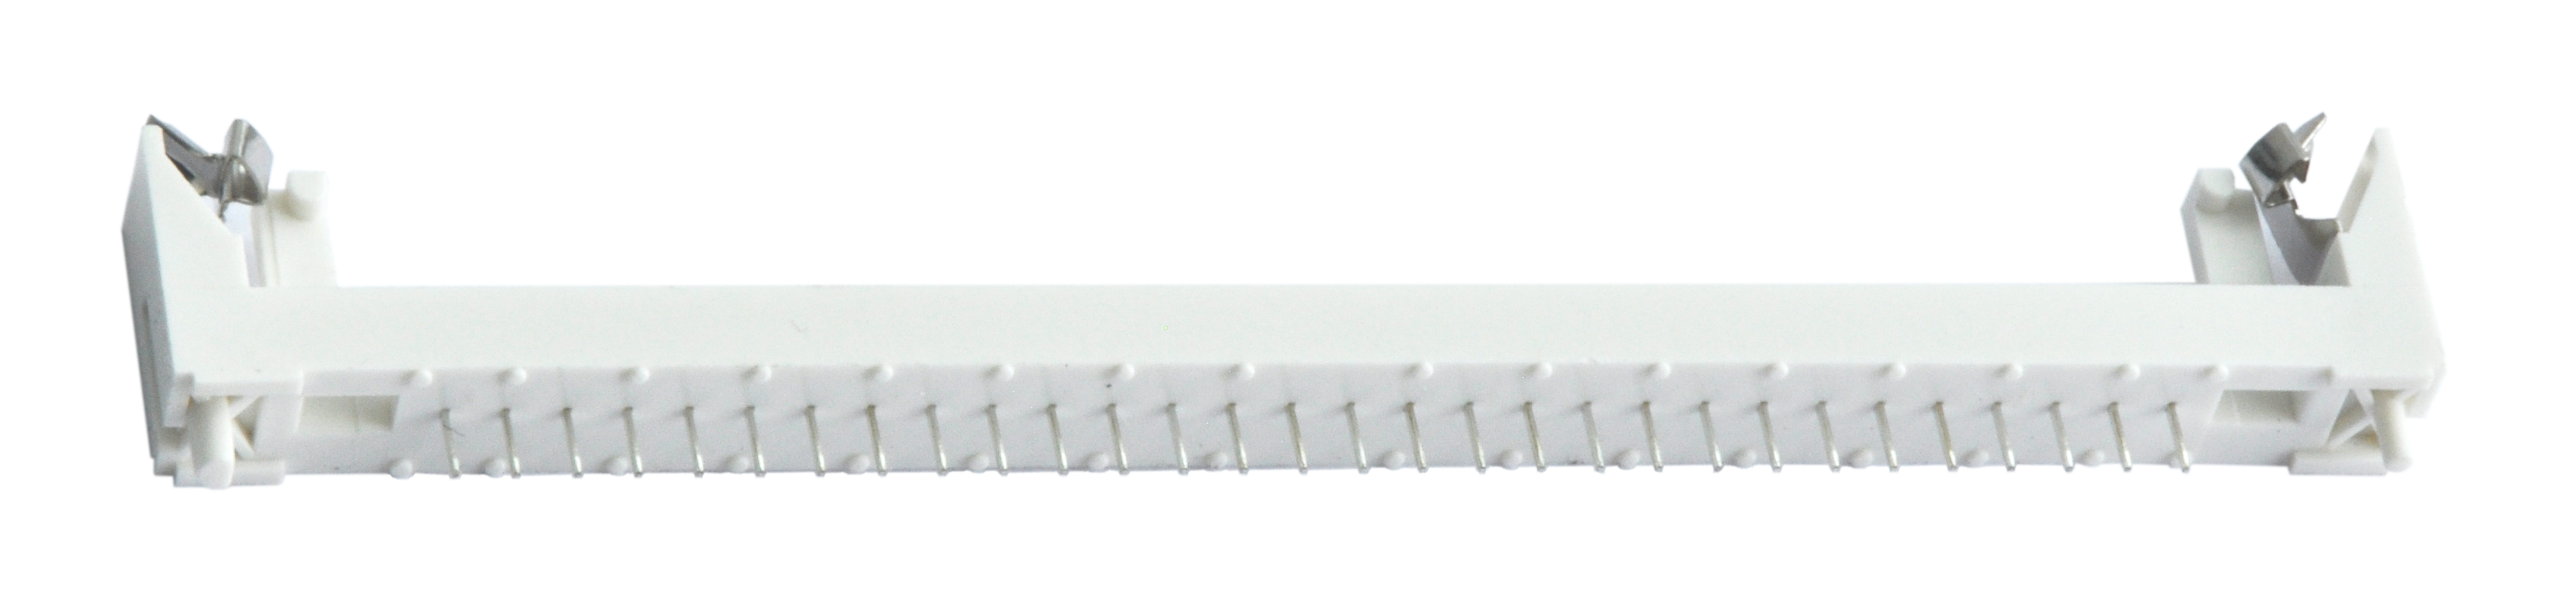
There is not a huge amount of grab in the socket as the pins aren't terribly long, but once everything is secure it does take a little force to remove again. The SIMM socket may come loose if SIMMs are removed, so probably best to remove the SIMM socket from the machine before replacing the SIMM memory stick itself.
SIPP sockets don't have any sort of mechanical keying, so make sure you insert the SIMM socket the right way! If you place a SIMM into the SIMM socket, one end of the SIMM has a groove cut into it. This groove is next to pin 1, and should line up with pin 1 of the SIPP socket, which should be labelled on the board (or possibly the opposite end is labelled with "30".)
Otherwise, the solution works well, and my 286 correctly picks up the extra 2MB of memory added via the SIMM adapter.
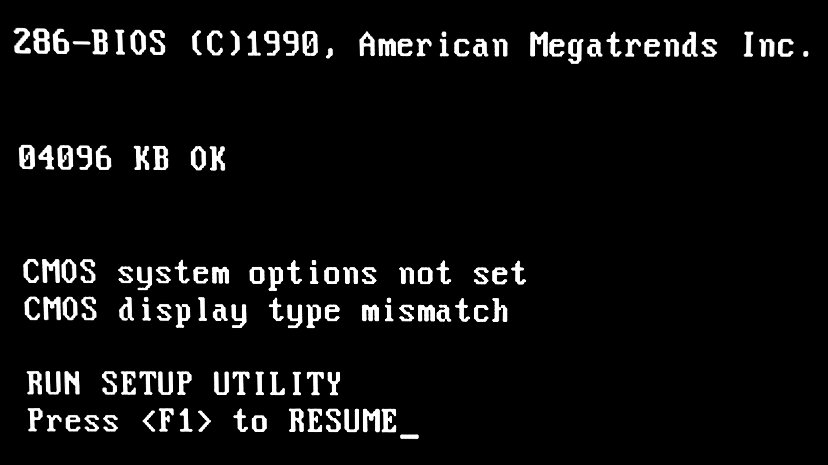
At long last, I have maxed out the amount of memory on my 286 motherboard! (Although the 286 can address up to 16MB, this board only supports 4MB.)